Build an IP Geolocation SaaS with Python/Django - Part 2
16 July, 2024
Securing API endpoints is paramount in web development, and Django provides robust mechanisms to achieve this. In this article, we delve into the implementation of token authentication, a popular method for ensuring that only authorized users or applications can access protected resources. We begin by exploring the fundamentals of authentication in Django and explaining the concept of token authentication and why it is a good fit for out IP info API. Additionally, we demonstrate the creation of middleware to handle authentication logic and the development of a custom decorator to enforce token authentication for API endpoints.
Frequently Asked Questions
apikey=j4q8b1c6g5r3e2t9n7h5a0p3l2k9m1i4s)
is convenient for demonstration purposes, it's not the most secure method, as URLs can be logged in browser history or server logs. For production environments, it's recommended to pass tokens in headers or request bodies for better security.
- create a Token model to store tokens
- create a Middleware to handle authentication
- create and attach decorators to enforce authentication for specific endpoints
These components work together to verify the authenticity of incoming requests.
How Django Authentication Works
Django provides a complex, expandable and customizable authentication system out of the box. Developers can manage user authentication, authorization, and session management by writing pluggable components and hooking them into the Django framework.
Here are the main concepts related to Django authentication system:
- The User model: Stands at the core of any Django application. It can be extended or customized, but most Django applications rely on having such a model defined.
- Authentication Middleware: Once a request arrives in the Django application, a series of middleware functions are applied on it.
One of them is the
'django.contrib.auth.middleware.AuthenticationMiddleware'. This middleware is responsible for figuring out who the current authenticated user is and attaching it torequest.userso that all the other components down the line can use it. - Authentication Backends: These are pluggable components that can do the actual user authentication.
We can use what Django comes with by default (like the
"django.contrib.auth.backends.ModelBackend") or we can write our own.
To complement all these, Django comes in with ready-made customizable views for authenticating users via Username/Password. Also, Django has a robust permission system in place that fits nicely into this authentication system. We will hover touch on that subject sometime in the future.
APIToken Model
Let's now create the APIToken model. We are going to generate the keys automatically using the
secrets library. A callable that is passed as the
default parameter to Django Model Field will be called every time in order to obtain a default value
when a new model is created. We are going to put this code in models.py.
1 2 3 4 5 6 7 8 9 10 11 12 13 14 15 16 17 18 19 20 | import secrets from django.db import models from django.utils import timezone from django.contrib.auth import get_user_model UserModel = get_user_model() def random_key(): return secrets.token_urlsafe(32) class APIToken(models.Model): key = models.CharField(max_length=255, unique=True, default=random_key) user = models.ForeignKey(UserModel, on_delete=models.CASCADE) created_at = models.DateTimeField(default=timezone.now) def __str__(self): return f"<APIToken:{self.user}:{self.created_at.date()}>" |
Notice how we are using the get_user_model() in order to get the UserModel. Even though Django comes with a
User model, sometimes it is useful to create a different one for better customization. Not hardcoding the
User model is a good practice when working on Django projects.
Custom Django User Model
A django application can either use the default user model
django.contrib.auth.models.User or we can define a custom one.
In order for our code to be easily integrated with outher Django applications and play nicely with other components,
it is good practice to use the get_user_model() in order to fetch the User model.
As usual, after we create a model, don't forget to create (python manage.py createmigrations)
and apply the migrations (python manage.py migrate).
Let's add the model to the Django admin by adding this to the admin.py file:
1 2 3 4 5 6 7 | from django.contrib import admin from ipdata.models import APIToken @admin.register(APIToken) class APITokenAdmin(admin.ModelAdmin): pass |
Go the the admin site and create an APIToken:

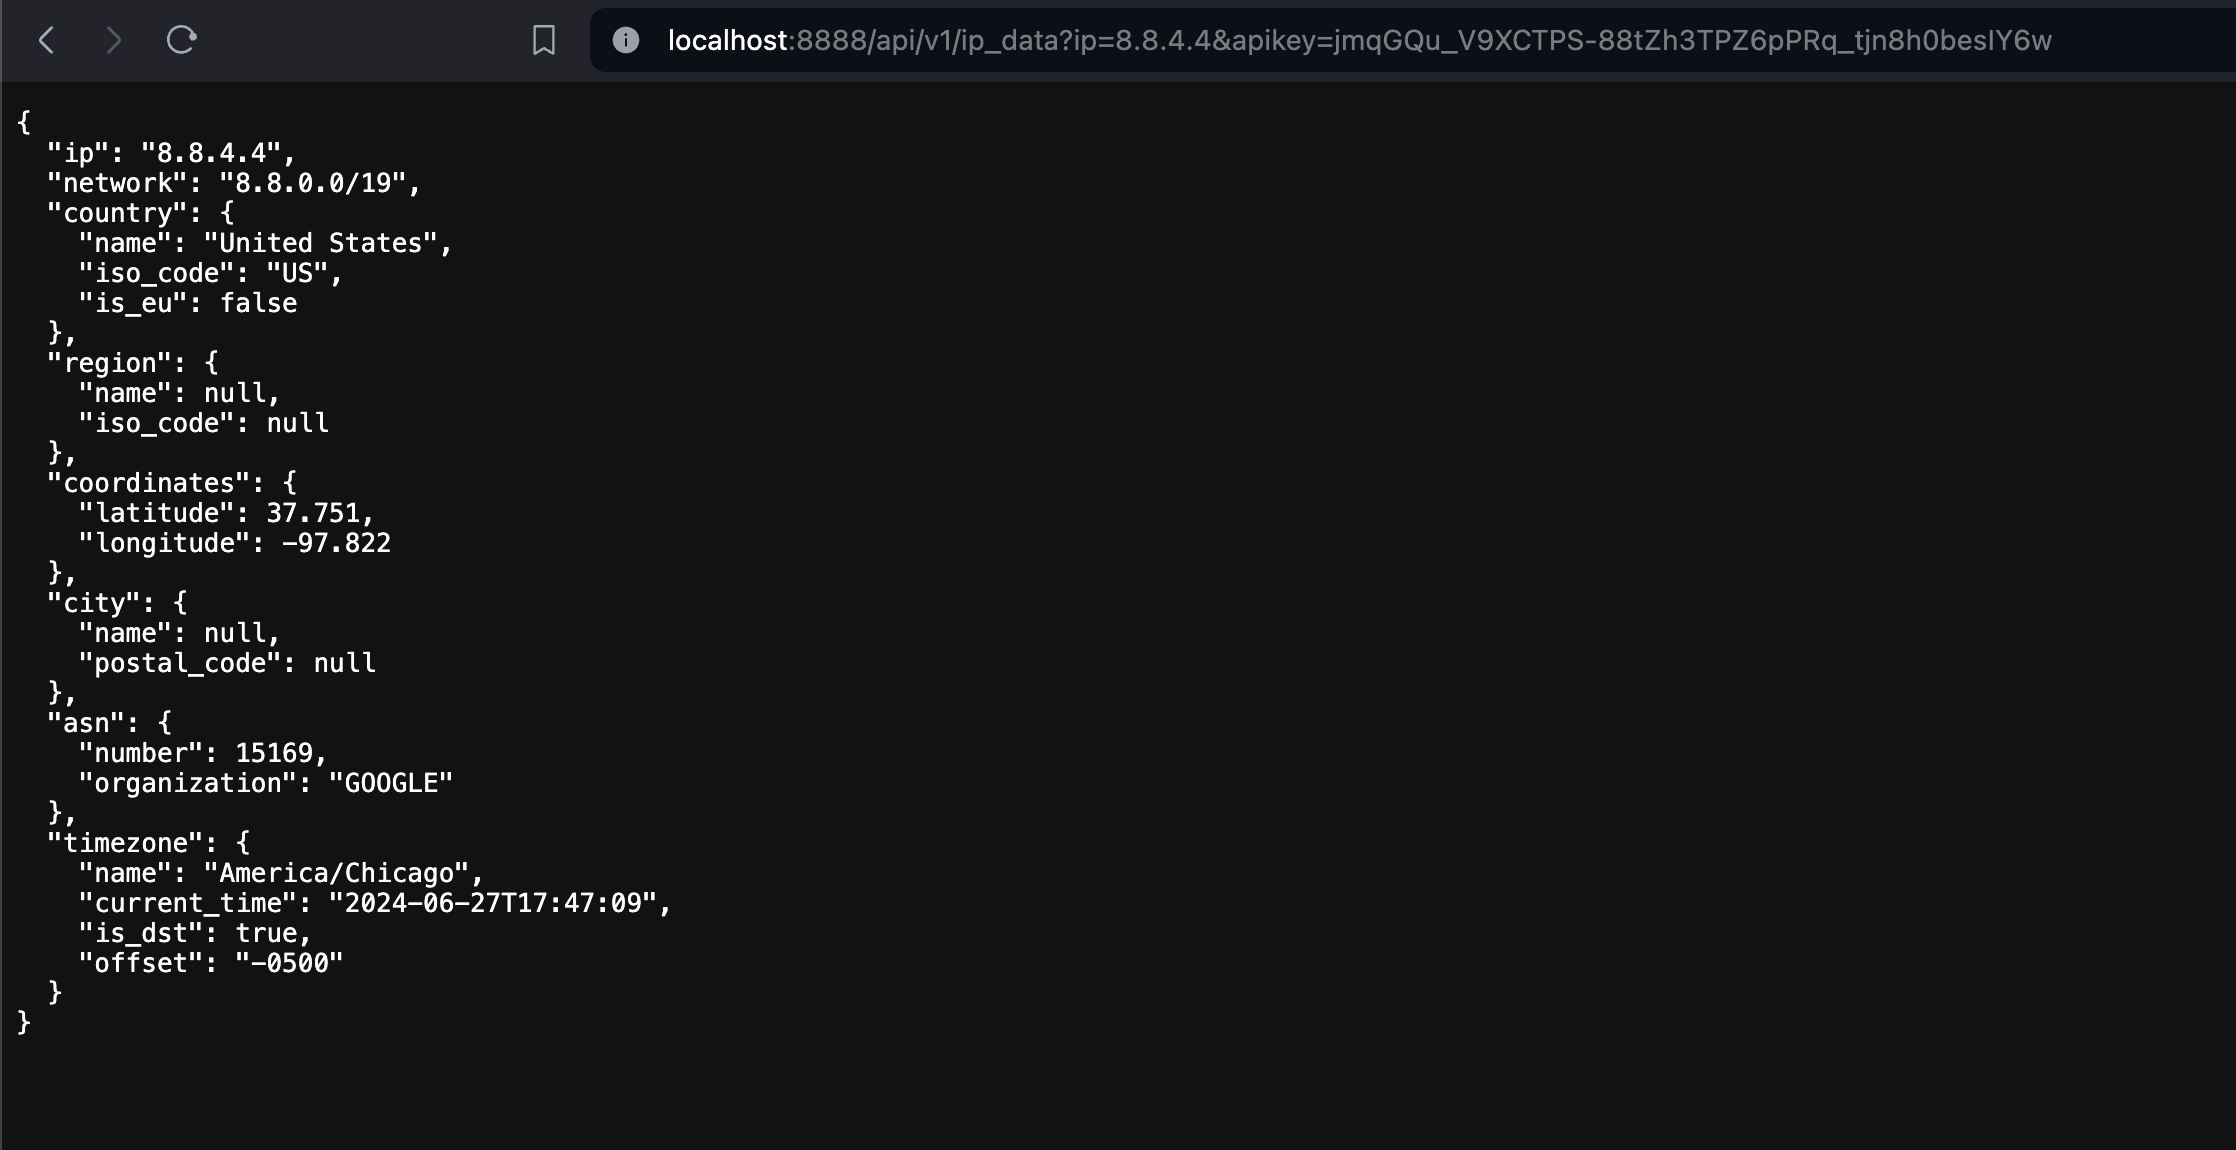
Copy the key and keep it handy (jmqGQu_V9XCTPS-88tZh3TPZ6pPRq_tjn8h0besIY6w)
Method I: View Decorator
The simplest way to authenticate users by token is to create a decorator
that attaches the user to the request object then passes it along to the view function. Let's create a
decorators.py file.
1 2 3 4 5 6 7 8 9 10 11 12 13 14 15 16 17 18 19 | from django.http import JsonResponse from .models import APIToken def token_auth(view_func): def wrapped_view(request, *args, **kwargs): key = request.GET.get('apikey') if not key: return JsonResponse({'error': 'Unauthorized'}, status=401) try: token = APIToken.objects.get(key=key) request.user = token.user except APIToken.DoesNotExist: return JsonResponse({'error': 'Unauthorized'}, status=401) return view_func(request, *args, **kwargs) return wrapped_view |
Going back to views.py file, let's import the decorator and decorate the
ip_data view function.
1 2 3 4 5 6 7 8 9 10 11 12 | from .decorators import token_auth # ... @token_auth def ip_data(request): try: ip = request.GET['ip'] except KeyError: return JsonResponse({'error': 'IP address not provided'}, status=400) # ... |
Let's now test that everything is going accordingly:


Method II: Authentication Middleware
Middlewares in Django works like this: for a given request, Django loops over a list of middleware classes
that preprocess the request or postprocess the response in some way.
Our middleware will try to authenticate the user (assign a user to the request).
A middleware authenticates a request by assigning the user to
request.user.
The problem with this approach is that it will check for the token on every request throughout the entire application.
Even requests that are for example for the /admin.
This approach would work very well for a microservice that only answers to requests that need to be authenticated by token.
However, this is not the case, but let's explore how it works.
Our TokenAuthenticationMiddleware will look for a token in the GET params.
It then will try matching it to an existing APIToken.
If found, attach the owner of the token to the request object.
Let's create a ipdata/middleware.py file:
1 2 3 4 5 6 7 8 9 10 11 12 13 14 15 16 17 18 19 20 21 22 | from django.http import JsonResponse from .models import APIToken class APITokenAuthenticationMiddleware: def __init__(self, get_response): self.get_response = get_response def __call__(self, request): key = request.GET.get('token') if key: try: token = APIToken.objects.get(key=key) request.user = token.user return self.get_response(request) except APIToken.DoesNotExist: return JsonResponse( {'error': 'Unauthorized'}, status=401) else: return JsonResponse( {'error': 'Unauthorized'}, status=401) |
We now need to add the middleware class we created to the list of middlewares Django iterates over.
Head over to settings.py and find the
MIDDLEWARE section. Let's add our new class to the list:
1 2 3 4 5 6 7 8 9 10 11 12 13 14 15 16 | # ... MIDDLEWARE = [ 'django.middleware.security.SecurityMiddleware', 'django.contrib.sessions.middleware.SessionMiddleware', 'django.middleware.common.CommonMiddleware', 'django.middleware.csrf.CsrfViewMiddleware', 'django.contrib.auth.middleware.AuthenticationMiddleware', 'django.contrib.messages.middleware.MessageMiddleware', 'django.middleware.clickjacking.XFrameOptionsMiddleware', # Add our middleware here 'ipdata.middleware.APITokenAuthenticationMiddleware', ] # ... |
Before trying this out, make sure you remove the @token_auth
decorator from our ip_data view.
We now have everything glued together. Let's test it out! Run the Django development server:
python manage.py runserver
As you can see, the result is similar with the exception that the middleware solution applies application wide whereas with the token solution we need to decorate every view we want to protect.
