Mega Tutorial: Build a Trello Clone - Part 1
07 November, 2024
In this first part of our series on building a Trello clone using Django, we'll walk you through setting up the foundation for user authentication. Django, a high-level Python web framework, simplifies the process of creating secure and scalable web applications with its built-in authentication system. Let's get started!
What is Trello?
Trello is one of the most popular Project Management / Task List Software out there. It's appeal stems from it's simplicity and ease of use.
Trello uses a Kanban-inspired system of "boards" > "lists" > "cards".
It's simple design makes it easy to master and integrate in your daily workflow.
Trello also uses a freemium business model. Most of the features are available for free. More advanced / enterprise features are included in paid plans.
Our Toolkit
Here are the tools we're going to use in this tutorial:
- Django - Of course we're going to use Django! It's our favorite web framework, right?
- AlpineJS - AlpineJS is the new cool kid on the block. The new and improved jQuery. Great for making our frontend more dynamic without having to only rely on APIs calls like in the case of a Single Page Application (SPA)
- Tailwind CSS - one of the CSS frameworks that really makes writing interfaces simpler. I generally hate writing CSS and making things pretty, but Tailwind really helps a lot. There are other alternatives out there, but this is one of my favorites.
Create a superuser
Before writing the authentication mechanism, let's first create a user.
We are going to create a superuser, which means we can login into the Django admin
as well and will have full permissions everywhere in the application
python manage.py createsuperuser
Follow the prompts. After the user has been created launch the development server:
python manage.py runserver
Head over to http://localhost:8000 and authenticate with your new user.
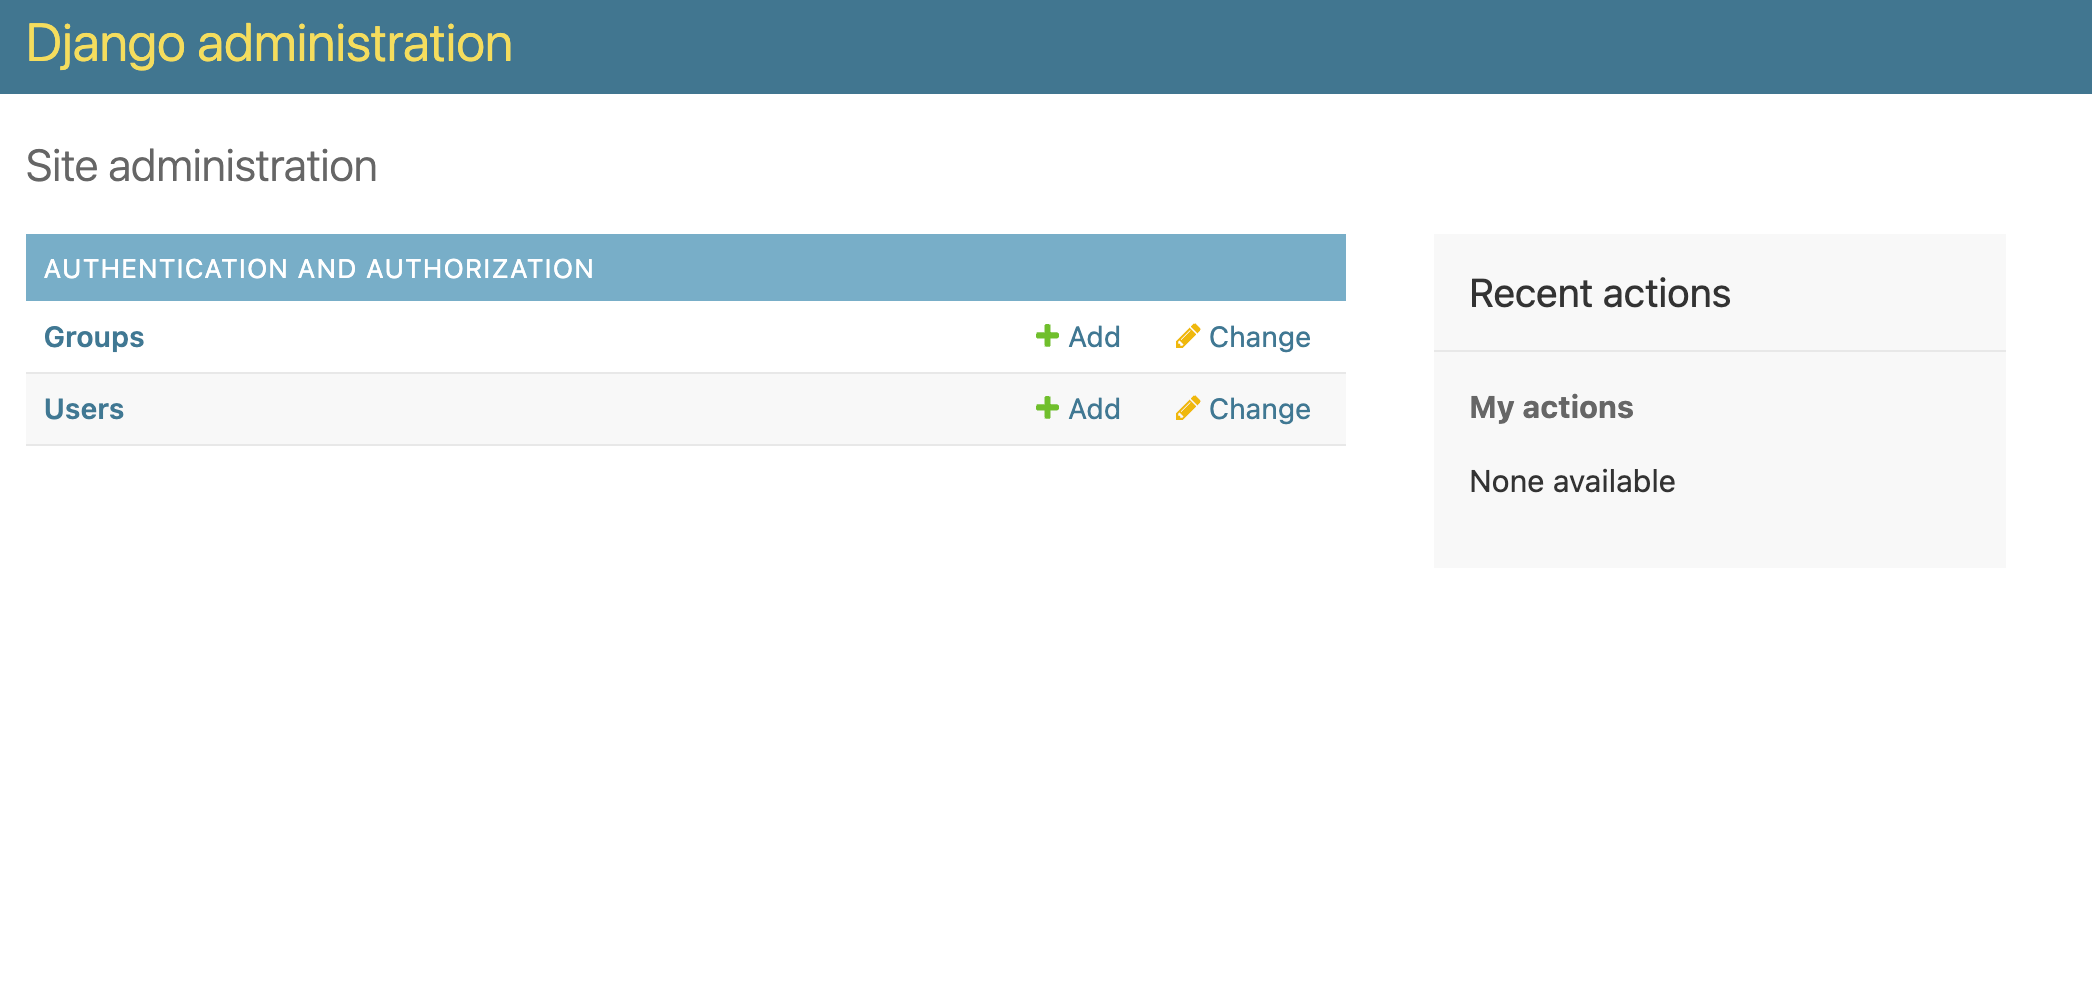
You should see the classic Django admin interface:

Create "accounts" Application
Let's use the Django command to init the accounts application:
python manage.py startapp accounts
Create Dashboard View
A Dashboard View is the page a user sees right after logging in.
It is accessible only to authenticated user because it is different for each user.
In our case, our dashboard view will display our list of active Kanban boards.
We're going to create a draft one in the accounts application,
but later will create a real one after we define our models.
Let's add the view in views.py like this:
1 2 3 4 5 6 7 | from django.http import HttpResponse from django.contrib.auth.decorators import login_required @login_required def dashboard(request): return HttpResponse("Home", status=200) |
For now our dashboard just displays Home. We will come back to it later.
What we can note is that the view is decorated with login_required decorator.
This makes the view only available for authenticated users.
If we try to access this view without being authenticated we will get redirected to the login view.
Let's now attach the view to the urls.py:
1 2 3 4 5 6 7 8 | from django.urls import path from accounts.views import dashboard urlpatterns = [ path('', dashboard, name='home'), ] |
Login View
Depending on your needs, you might need to write the LoginView but Django provides a default implementation that we can customize to our needs.
Let's use the Django implementation and add it to urls.py:
1 2 3 4 5 6 7 8 9 10 11 12 13 | from django.contrib.auth.views import LoginView from django.urls import path from accounts.views import dashboard urlpatterns = [ path('login', LoginView.as_view( template_name="accounts/login.html", redirect_authenticated_user=True, next_page="home", ), name='login'), path('', dashboard, name='home'), ] |
Create a login.html inside the templates/accounts folder inside the accounts application:
1 2 3 4 5 6 7 8 9 | <!DOCTYPE html> <html lang="en"> <head> </head> <body> {{ form }} </body> </html> |
Head over to /accounts/login in your browser. Try to login as the user you created earlier.
If using correct credentials you should get redirected to the dashboard view.
If using incorrect credentials you should see some errors.
Making Login View Pretty
Of course, we can't leave the login form like that. Let's try to make it better. There are ways of using the form API while still customizing the HTML but for now let's just write raw HTML. I've been drawing inspiration from Hyper UI and Material Tailwind
Here's how I like to structure my HTML templates:
-
{PROJECT}/templates/master.html- In this template we specify the most general javascript files we want to include and also general styles, applicable everywhere in the application. -
{PROJECT}/{APPLICATION}/templates/{APPLICATION}/base.html- This is the base template for the current application. It includes specific JS/CSS includes but also the general layout. -
{PROJECT}/{APPLICATION}/templates/{APPLICATION}/{VIEW_NAME}.html- This is the view specific template. It contains the specific components of the current view.
Master Template
Here's the simple template we are going to use as master (taskleap/templates/master.html):
1 2 3 4 5 6 7 8 9 10 11 12 13 14 15 16 17 | <!DOCTYPE html> <html lang="en"> <head> <meta charset="UTF-8"> <!-- Tailwind CSS Framework --> <script src="https://cdn.tailwindcss.com"></script> <script src="https://cdn.jsdelivr.net/npm/alpinejs@3.x.x/dist/cdn.min.js" defer></script> <title>{% block title %}{% endblock %}</title> {% block head %} {% endblock %} </head> <body> {% block body %} {% endblock %} </body> </html> |
Accounts Base Template
This is our accounts base template at taskleap/accounts/templates/accounts/base.html:
1 2 3 4 5 6 7 8 9 10 11 12 | {% extends "master.html" %}
{% block body %}
<section class="px-8">
<div class="container mx-auto h-screen grid place-items-center">
<div class="relative flex flex-col bg-clip-border rounded-xl bg-white text-gray-700 md:px-24 md:py-14 py-8 border border-gray-300">
{% block content %}{% endblock %}
</div>
</div>
</section>
{% endblock %}
|
Notice how base basically sets up a container for our forms. This is the place where we will place our login and register forms.
Login Template
Here's our beautified Login template located at: taskleap/accounts/templates/accounts/login.html:
1 2 3 4 5 6 7 8 9 10 11 12 13 14 15 16 17 18 19 20 21 22 23 24 25 26 27 28 29 30 31 32 33 34 35 36 37 38 39 40 41 42 43 44 45 46 47 48 49 50 51 52 53 54 55 56 57 58 59 60 61 62 63 64 65 66 67 68 69 70 71 72 73 74 75 76 77 78 79 | {% extends "accounts/base.html" %}
{% block content %}
<div class="mt-4 mx-4 rounded-xl overflow-hidden bg-white text-gray-700 text-center">
<h1 class="text-5xl font-semibold text-blue-gray-900 mb-4">
TaskLeap Login
</h1>
<p class="font-sans text-base font-light font-normal md:max-w-sm">
Get your ducks in a row
</p>
</div>
<div class="p-6">
<form method="post" class="flex flex-col gap-4 md:mt-12">
{% csrf_token %}
<!-- Global Errors -->
{% for error in form.non_field_errors %}
<p class="mt-2 text-red-600 text-xs">
{{ error }}
</p>
{% endfor %}
<!-- Username -->
<div>
<label for="username" class="text-sm font-light block font-medium mb-2">
Username
</label>
<div class="relative w-full h-11">
<input
id="username"
type="text"
name="username"
placeholder="username"
value="{{ form.username.value|default_if_none:"" }}"
class="outline outline-0 w-full h-full font-normal border text-sm px-3 py-3 rounded-md focus:border-2 focus:border-gray-900"
/>
</div>
{% for error in form.username.errors %}
<p class="mt-2 text-red-600 text-xs">
*{{ error }}
</p>
{% endfor %}
</div>
<!-- /Username -->
<!-- Password -->
<div>
<label for="password" class="text-sm font-light block font-medium mb-2">
Password
</label>
<div class="relative w-full h-11">
<input
id="password"
type="password"
name="password"
placeholder="str0ng p@ssword"
value="{{ form.password.value|default_if_none:"" }}"
class="outline outline-0 w-full h-full font-normal border text-sm px-3 py-3 rounded-md focus:border-2 focus:border-gray-900"
/>
</div>
{% for error in form.password.errors %}
<p class="mt-2 text-red-600 text-xs">
*{{ error }}
</p>
{% endfor %}
</div>
<!-- /Password -->
<div>
<input class="select-none font-sans font-bold text-center text-sm py-3 px-8 rounded-lg bg-gray-900 text-white w-full"
type="submit" value="AUTHENTICATE"/>
</div>
<div class="text-sm font-light leading-normal text-inherit text-center mx-auto max-w-[19rem] !font-medium !text-gray-600">
<a href="#" class="text-gray-900">Terms of Service</a> & <a href="#" class="text-gray-900">Privacy
Policy.</a>
</div>
</form>
</div>
{% endblock %}
|
Notice how we displayed each field without using the form API. This is not ideal, but sometimes comes in handy.
This also helps us understand how the forms API works. For example, notice how we display global form errors and local field errors.
That's right, forms have 2 types of errors: non_field_errors and field errors.
Examples of non_field_errors are: The service is not available right now or some business logic involving several fields.
Logout View
Let's add the LogoutView as well. Django comes with a default implementation.
Make sure that after we logout, we are being redirected to the login view:
1 2 3 4 5 6 7 8 9 10 11 12 13 14 15 16 | from django.contrib.auth.views import LoginView, LogoutView from django.urls import path from accounts.views import RegisterView, dashboard urlpatterns = [ path('login', LoginView.as_view( template_name="accounts/login.html", redirect_authenticated_user=True, next_page="home", ), name='login'), path('logout', LogoutView.as_view( next_page="login", ), name='logout'), path('', dashboard, name='home'), ] |
Register View
This one is the most tricky. First, Django doesn't provide a default implementation for the view and second, the form generally has a lot of fields.
Let's first customize the form. This can be done by overriding the
django.contrib.auth.forms.UserCreationForm form. Here's how that goes:
1 2 3 4 5 6 7 8 9 10 11 | from django import forms from django.contrib.auth.models import User from django.contrib.auth.forms import UserCreationForm class RegisterForm(UserCreationForm): email = forms.EmailField() class Meta: model = User fields = ['username', 'email'] |
The UserCreationForm class makes sure to include and validate 2 password fields.
We just need to add the other fields we are interested in.
Next up, write the RegisterView in accounts/views.py.
Since Django doesn't have a default implementation, let's use the CreateView class:
1 2 3 4 5 6 7 8 9 10 11 12 | from django.contrib.messages.views import SuccessMessageMixin from django.urls import reverse_lazy from django.views.generic.edit import CreateView from .forms import RegisterForm class RegisterView(SuccessMessageMixin, CreateView): template_name = 'accounts/register.html' success_url = reverse_lazy('login') form_class = RegisterForm success_message = "Your account was created successfully" |
Let's link that into our accounts/urls.py:
1 2 3 4 5 6 7 8 9 10 11 12 13 14 15 16 17 | from django.contrib.auth.views import LoginView, LogoutView from django.urls import path from accounts.views import RegisterView, dashboard urlpatterns = [ path('login', LoginView.as_view( template_name="accounts/login.html", redirect_authenticated_user=True, next_page="home", ), name='login'), path('register', RegisterView.as_view(), name='register'), path('logout', LogoutView.as_view( next_page="login", ), name='logout'), path('', dashboard, name='home'), ] |
Finally, here's the accounts/templates/accounts/register.html template.
It follows the exact pattern of the login template, just different fields.
1 2 3 4 5 6 7 8 9 10 11 12 13 14 15 16 17 18 19 20 21 22 23 24 25 26 27 28 29 30 31 32 33 34 35 36 37 38 39 40 41 42 43 44 45 46 47 48 49 50 51 52 53 54 55 56 57 58 59 60 61 62 63 64 65 66 67 68 69 70 71 72 73 74 75 76 77 78 79 80 81 82 83 84 85 86 87 88 89 90 91 92 93 94 95 96 97 98 99 100 101 102 103 104 105 106 107 108 109 110 111 112 113 114 115 116 117 118 119 120 121 122 123 124 125 | {% extends "accounts/base.html" %}
{% block content %}
<div class="mt-4 mx-4 rounded-xl overflow-hidden bg-white text-gray-700 text-center">
<h1 class="text-5xl font-semibold text-blue-gray-900 mb-4">
TaskLeap Register
</h1>
<p class="font-sans text-base font-light font-normal md:max-w-sm">
Get your ducks in a row
</p>
</div>
<div class="p-6">
<form method="post" class="flex flex-col gap-4 md:mt-12">
{% csrf_token %}
<!-- Global Errors -->
{% for error in form.non_field_errors %}
<p class="mt-2 text-red-600 text-xs">
{{ error }}
</p>
{% endfor %}
<!-- Username -->
<div>
<label for="username" class="text-sm font-light block font-medium mb-2">
Username
</label>
<div class="relative w-full h-11">
<input
id="username"
type="text"
name="username"
placeholder="username"
value="{{ form.username.value|default_if_none:"" }}"
class="outline outline-0 w-full h-full font-normal border text-sm px-3 py-3 rounded-md focus:border-2 focus:border-gray-900"
/>
</div>
{% for error in form.username.errors %}
<p class="mt-2 text-red-600 text-xs">
*{{ error }}
</p>
{% endfor %}
</div>
<!-- /Username -->
<!-- Email -->
<div>
<label for="email" class="text-sm font-light block font-medium mb-2">
Email
</label>
<div class="relative w-full h-11">
<input
id="email"
type="email"
name="email"
placeholder="email@example.com"
value="{{ form.email.value|default_if_none:"" }}"
class="outline outline-0 w-full h-full font-normal border text-sm px-3 py-3 rounded-md focus:border-2 focus:border-gray-900"
/>
</div>
{% for error in form.email.errors %}
<p class="mt-2 text-red-600 text-xs">
*{{ error }}
</p>
{% endfor %}
</div>
<!-- /Email -->
<!-- Password -->
<div>
<label for="password1" class="text-sm font-light block font-medium mb-2">
Password
</label>
<div class="relative w-full h-11">
<input
id="password1"
type="password"
name="password1"
placeholder="str0ng p@ssword"
value="{{ form.password1.value|default_if_none:"" }}"
class="outline outline-0 w-full h-full font-normal border text-sm px-3 py-3 rounded-md focus:border-2 focus:border-gray-900"
/>
</div>
{% for error in form.password1.errors %}
<p class="mt-2 text-red-600 text-xs">
*{{ error }}
</p>
{% endfor %}
</div>
<!-- /Password -->
<!-- Password2 -->
<div>
<label for="password2" class="text-sm font-light block font-medium mb-2">
Repeat Password
</label>
<div class="relative w-full h-11">
<input
id="password2"
type="password"
name="password2"
placeholder="repeat password"
value="{{ form.password2.value|default_if_none:"" }}"
class="outline outline-0 w-full h-full font-normal border text-sm px-3 py-3 rounded-md focus:border-2 focus:border-gray-900"
/>
</div>
{% for error in form.password2.errors %}
<p class="mt-2 text-red-600 text-xs">
*{{ error }}
</p>
{% endfor %}
</div>
<!-- /Password2 -->
<div>
<input class="select-none font-sans font-bold text-center text-sm py-3 px-8 rounded-lg bg-gray-900 text-white w-full"
type="submit" value="REGISTER"/>
</div>
<div class="text-sm font-light leading-normal text-inherit text-center mx-auto max-w-[19rem] !font-medium !text-gray-600">
<a href="#" class="text-gray-900">Terms of Service</a> & <a href="#" class="text-gray-900">Privacy
Policy.</a>
</div>
</form>
</div>
{% endblock %}
|
Everything Together
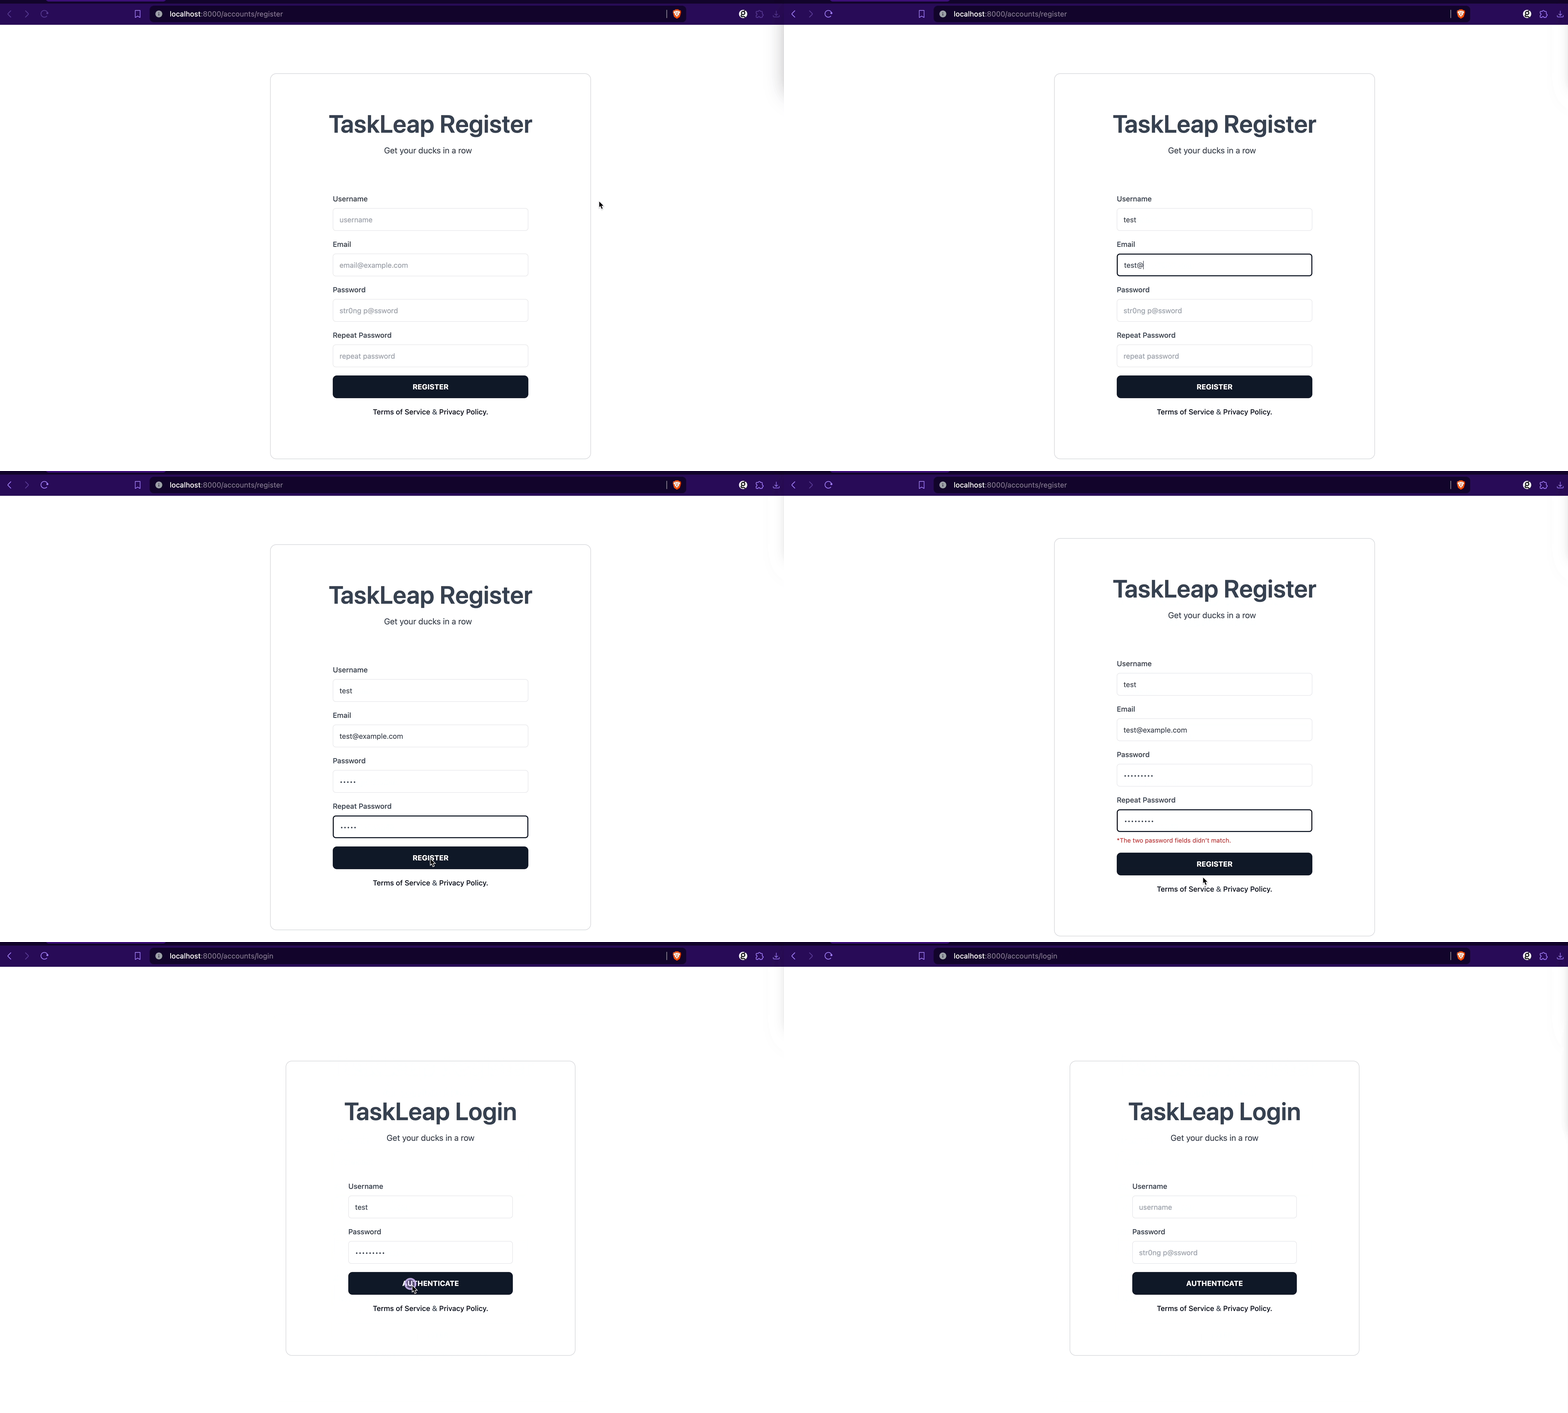
Here's how the code we wrote so far fits together:


